Overview
For users with Manager level access, they can create and manage user accounts directly within AssetWhere. This article explains how to add a new user, assign the appropriate role, and activate their account.
TABLE OF CONTENTS
Instructions to How to Add/Edit Users
Step 1: Launch the AssetWhere Admin interface
- Log in to AssetWhere using your organisation's URL
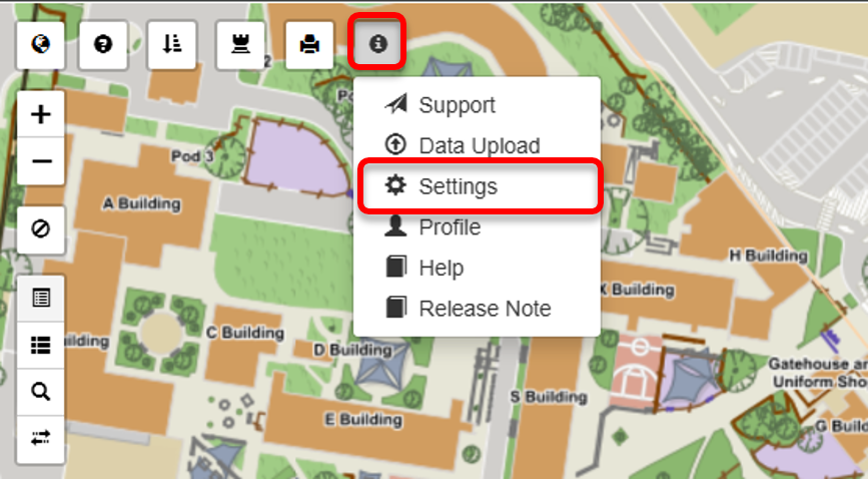
- Click the Support icon and select Settings. This will launch the AssetWhere Admin interface.
- If the admin module does not launch, it is likely you do not have the correct level of access. Please reach out to your AssetWhere Manager user at the school or to us at assetwheresupport@tes.com
Step 2: User Settings tab
- Select Users tab.
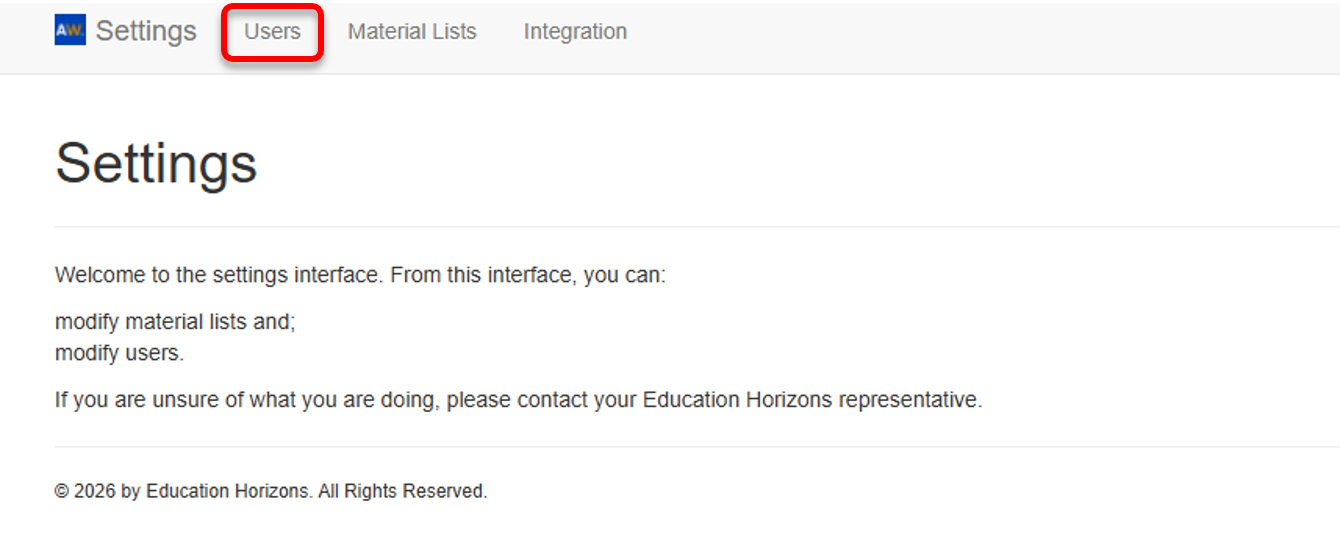
- The Users page displays all existing users in AssetWhere. From this page, you can manage user accounts and permissions.
Step 3: Create a New User
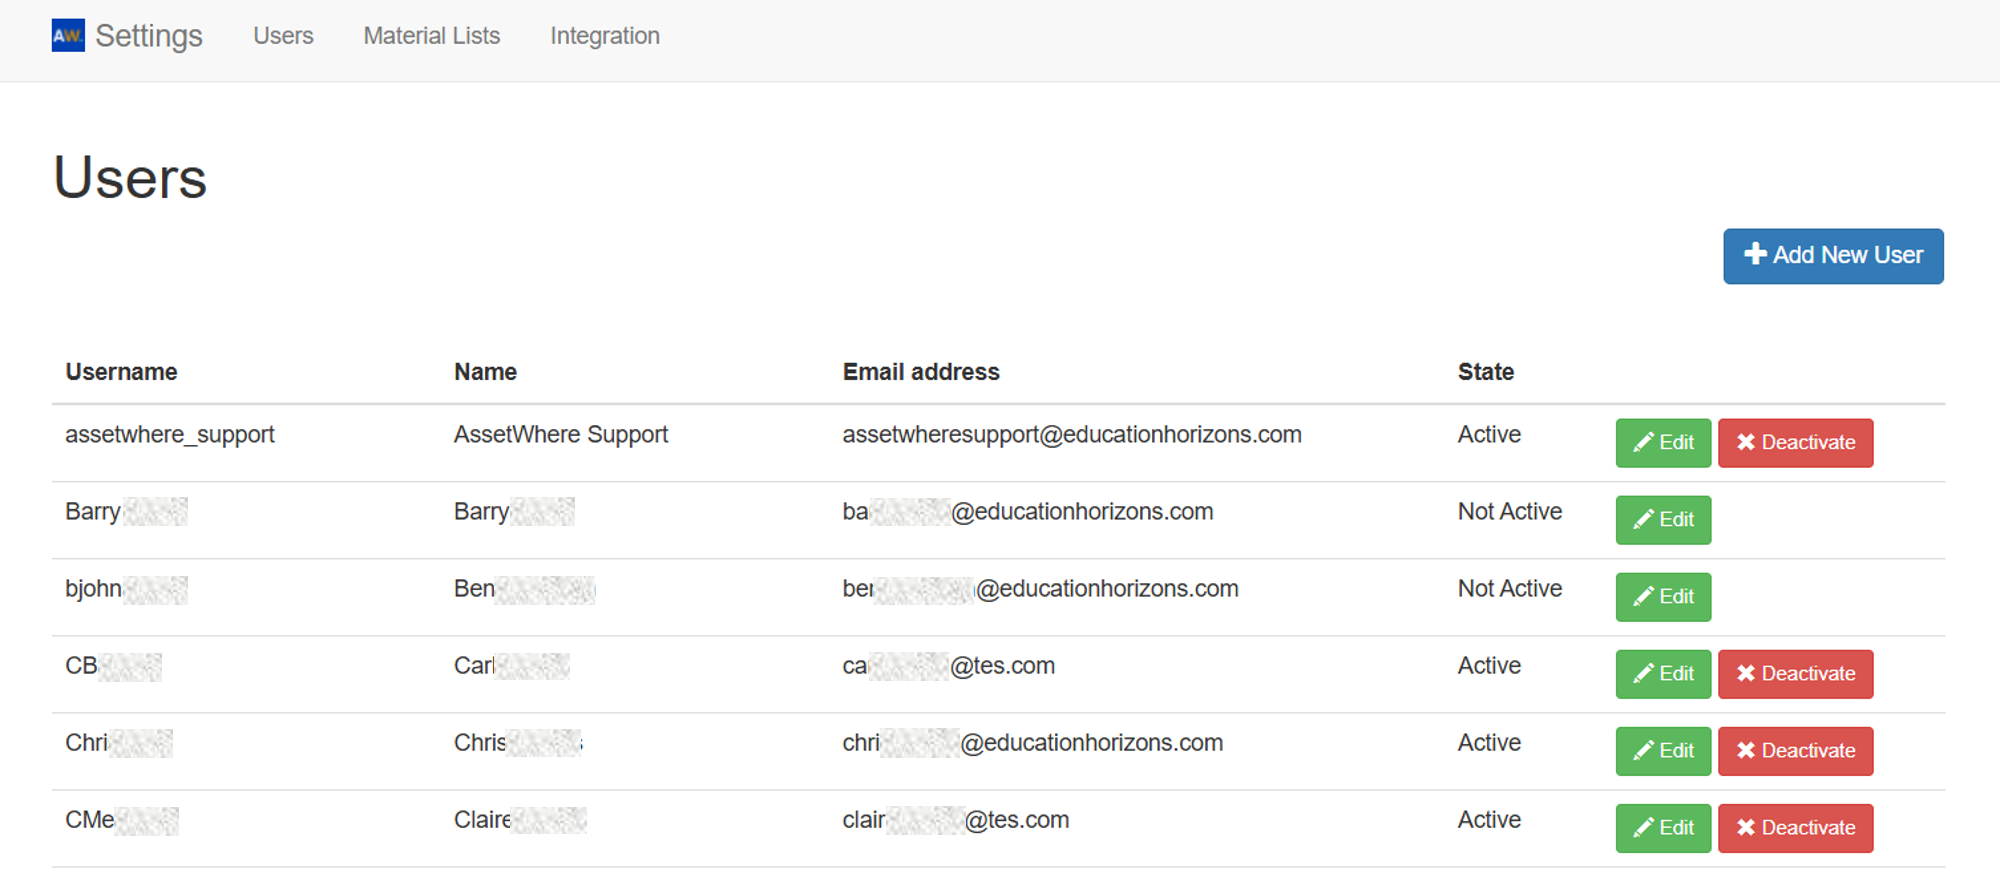
- Click the Add New User button to create a new user .
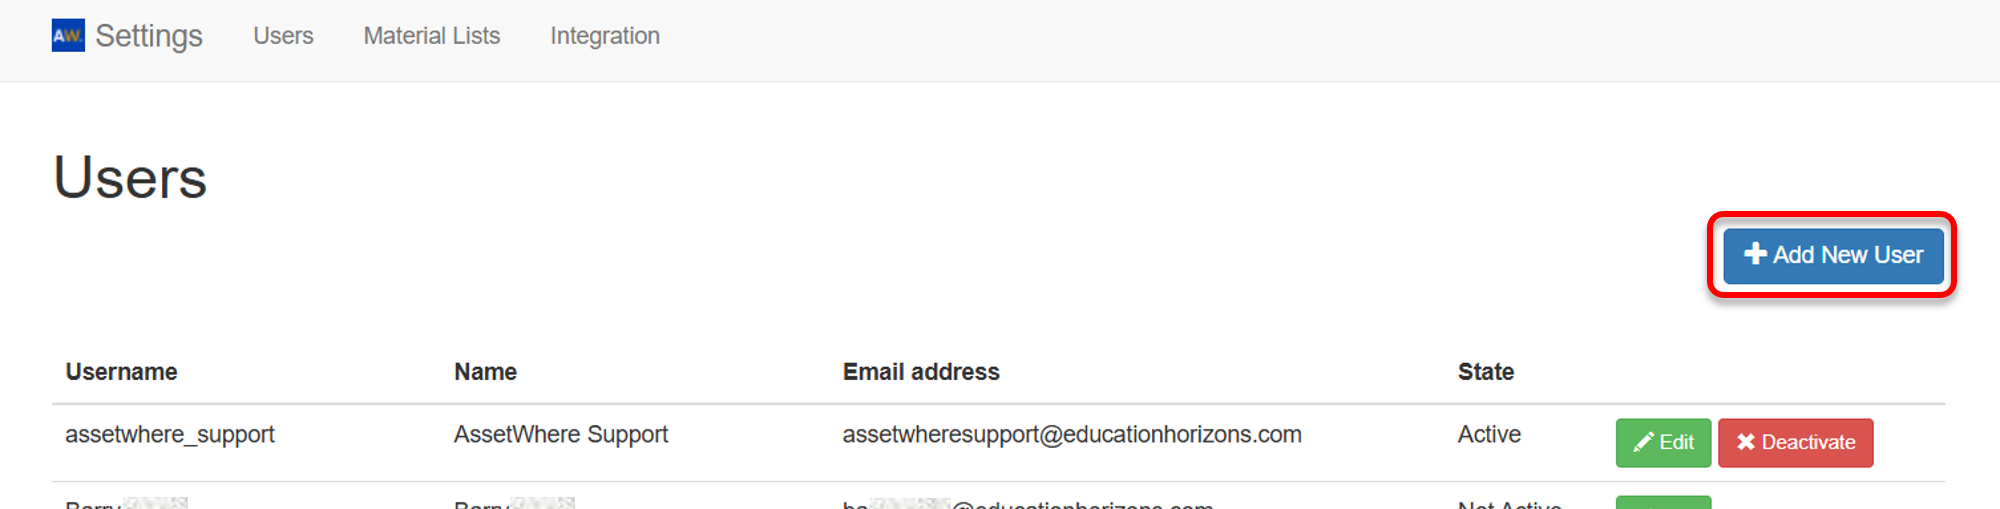
- Complete the required user details:
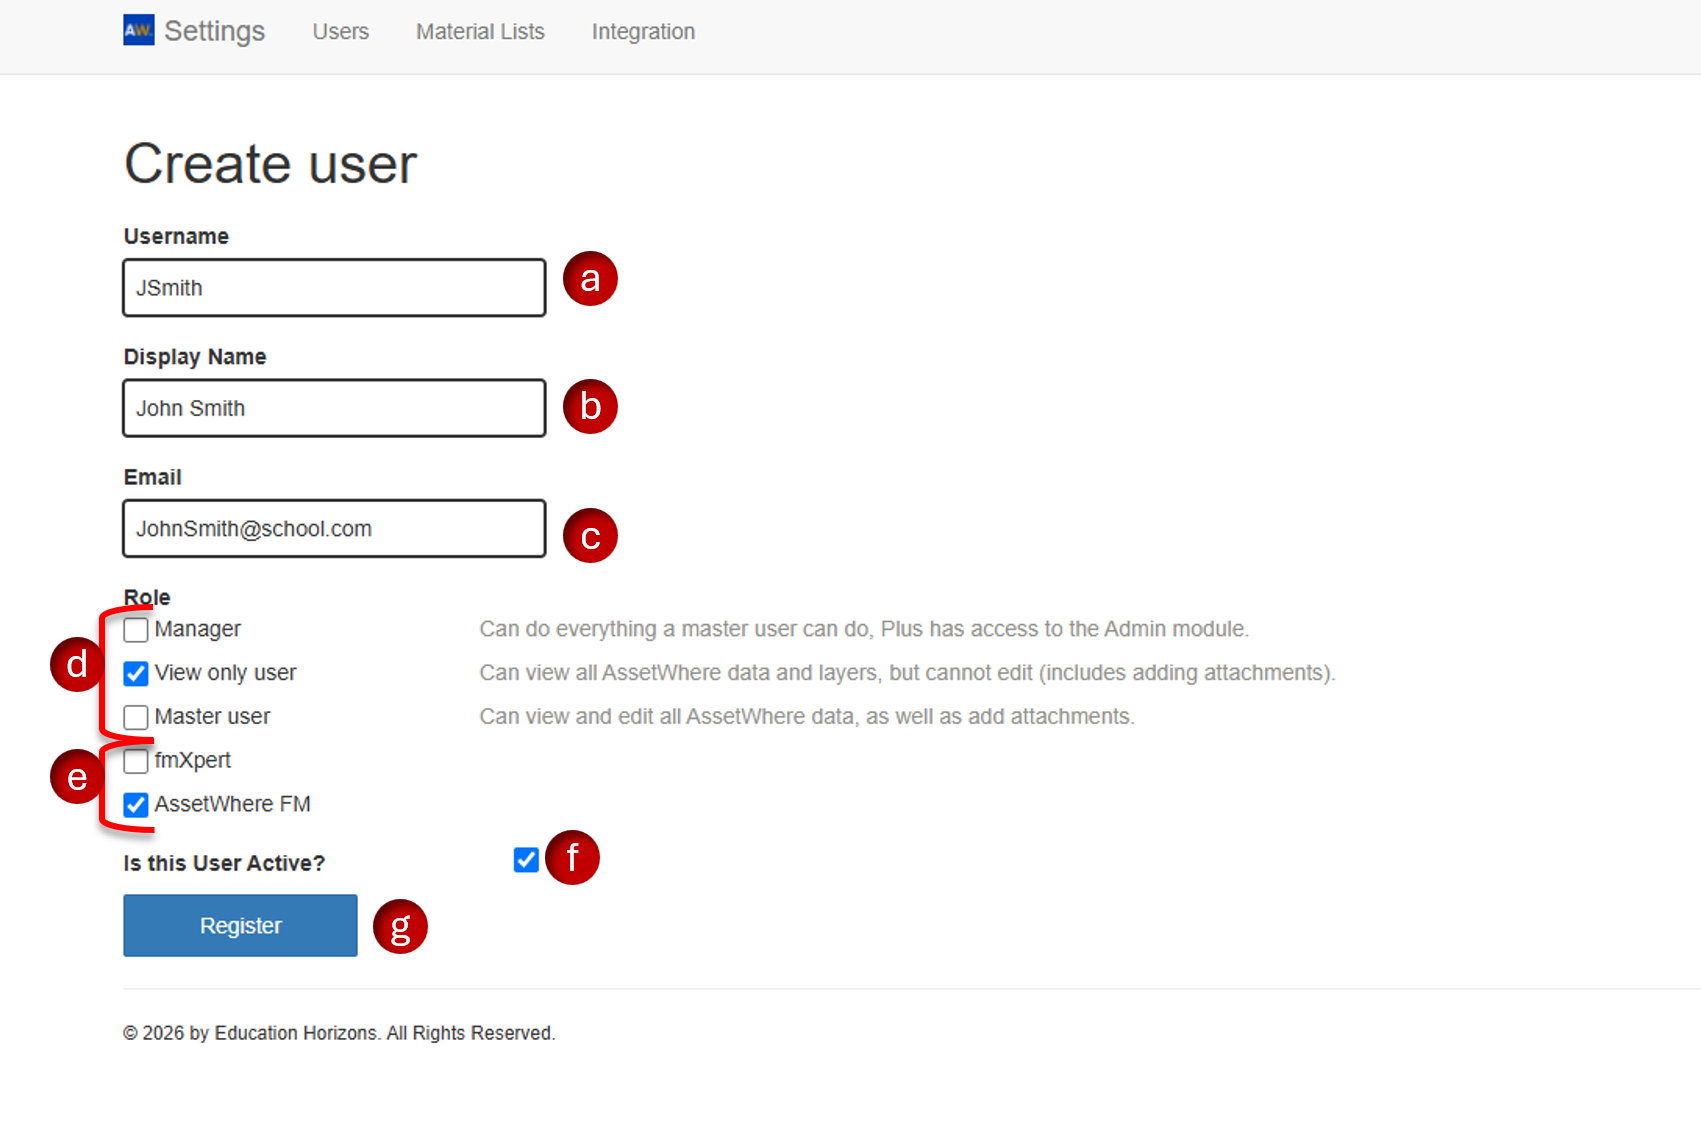
- Username: Enter a username. Avoid using special characters, including spaces, dots, and dashes. We recommend using the first initial and last name with no spaces (for example, jsmith).
- DisplayName: Enter the name to be displayed in AssetWhere. We recommend using the user's first and last name (for example, John Smith).
- Email address: Enter the user's email address.
- User Role: Select the appropriate role by checking one the relevant boxes:
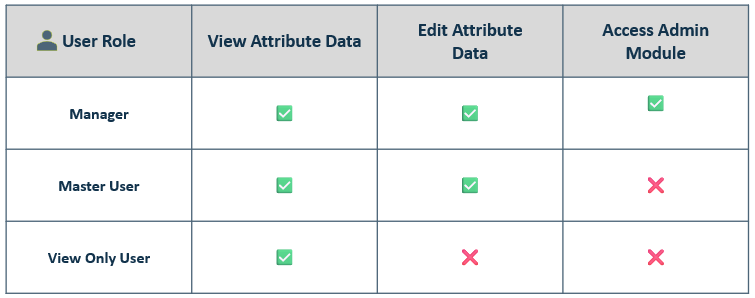
- AssetWhereFM / fmXpert: If your school uses AssetWhereFM (MyBuildings) or fmXpert, check the corresponding box to allow the user to view and launch work requests directly from AssetWhere.
- Active User: Check the User Active box to activate the account.
- Register: Click the Register button to create the user.
- Once the user has been registered, an email will be sent to their nominated email address. The user can then follow the instructions in the email to create a password and activate their account to log in to AssetWhere.
Step 4: Edit a Existing User
⚠️ Note: If you need to update a user's email address, please contact assetwheresupport@tes.com , as this change can only be made by the TES team.
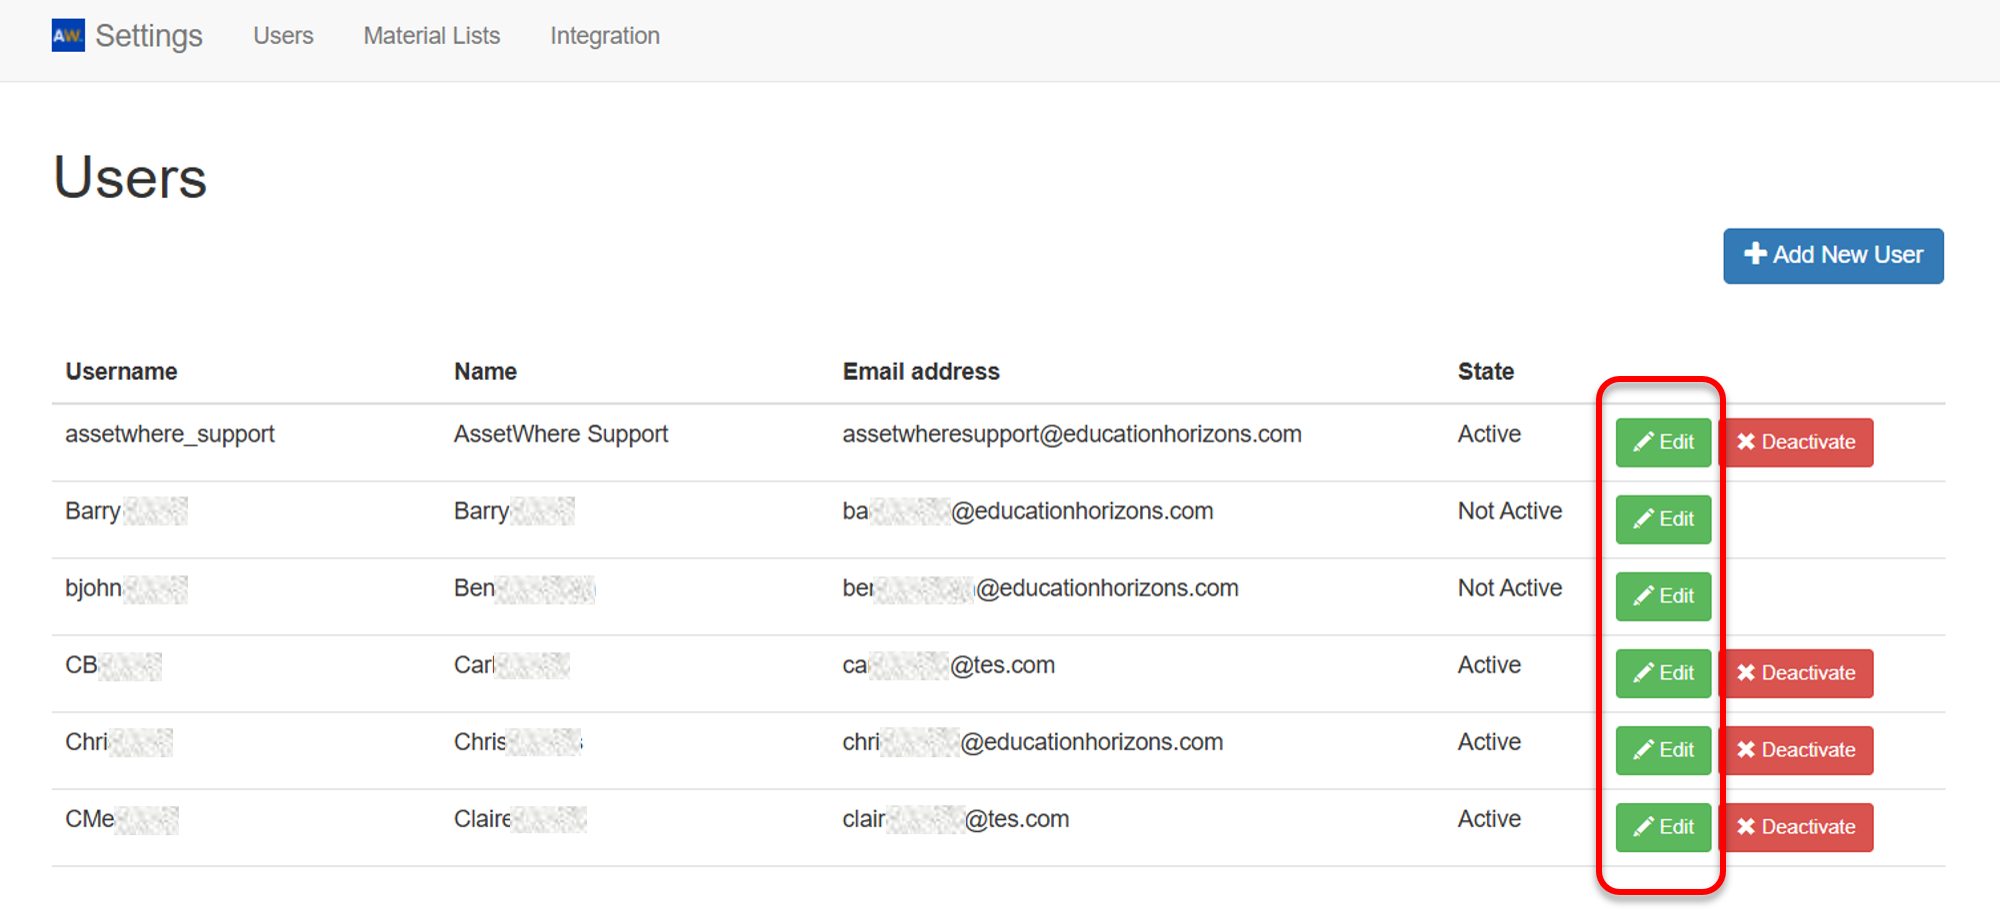
- In the Users tab, locate the user you wish to edit (Step 2).
- Click the Edit button next to the user.
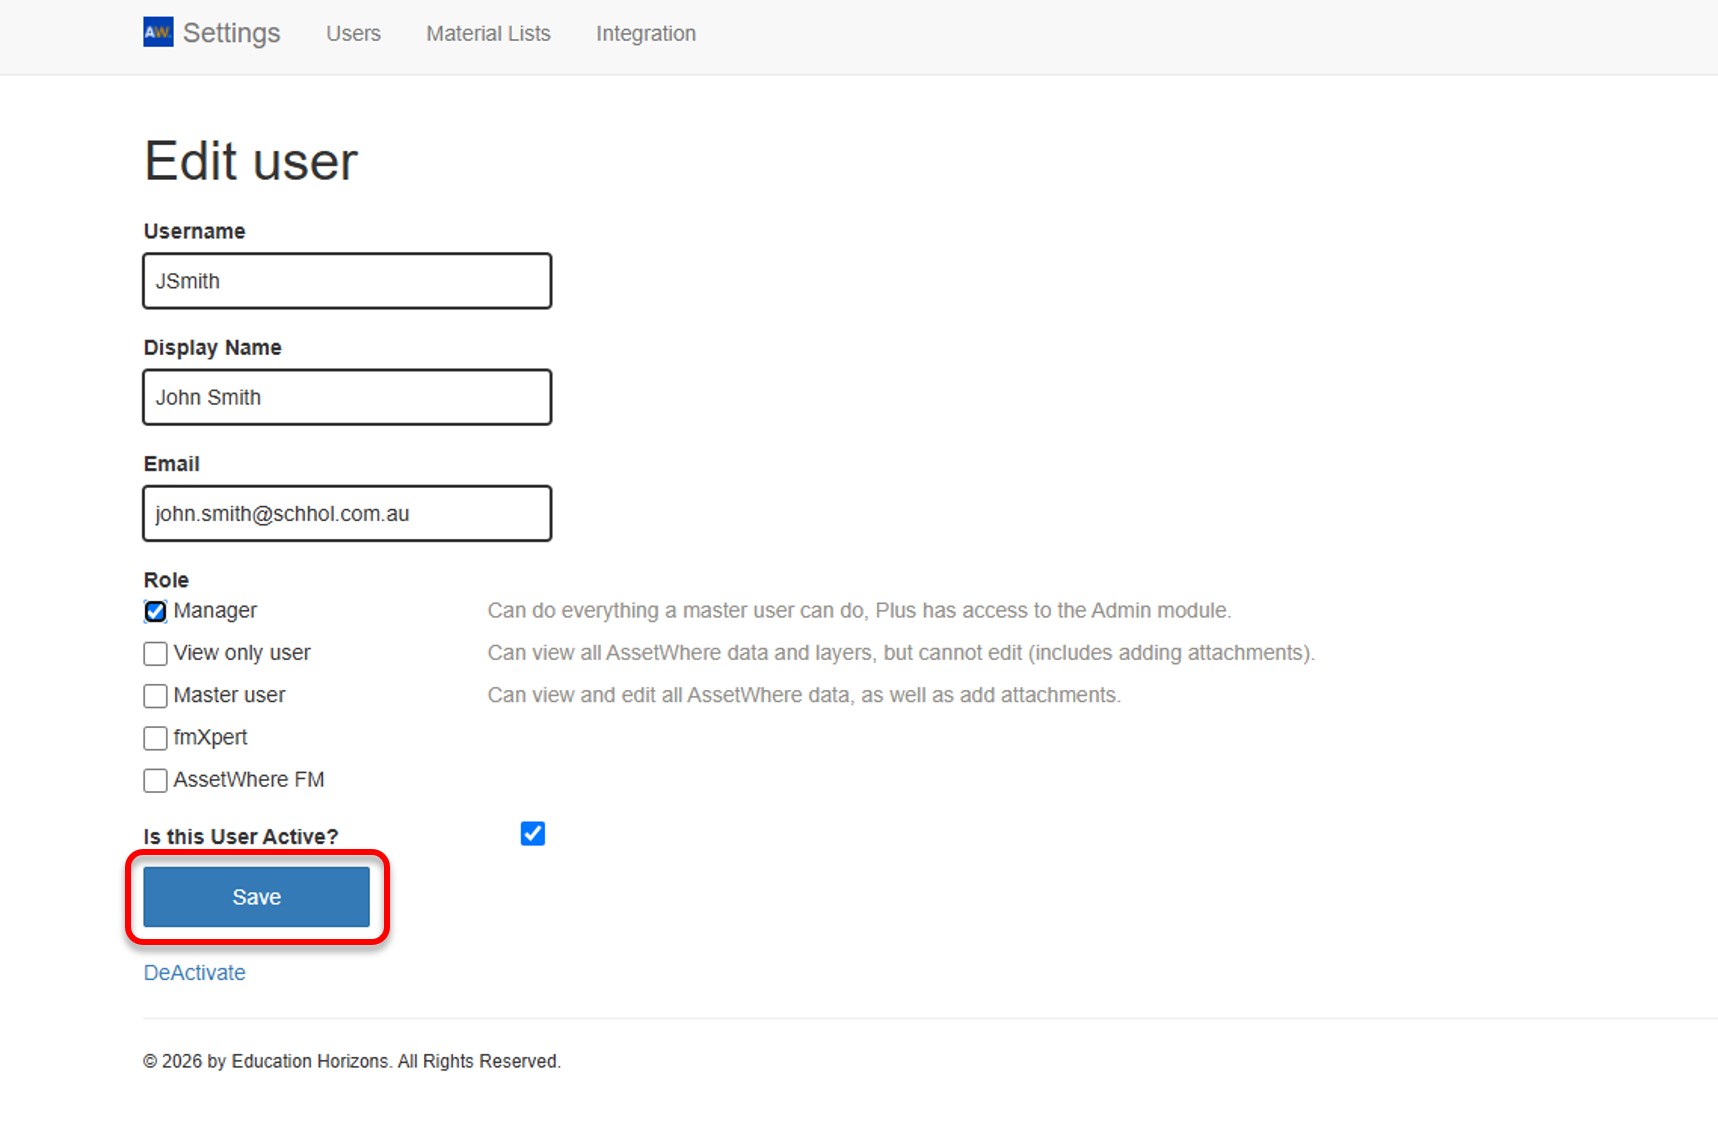
- Update the required user details, such as: Username, Display Name, User Roles, excluding the email address.
- If an email address needs to be changed, please contact assetwheresupport@tes.com
- If an email address needs to be changed, please contact assetwheresupport@tes.com
- To deactivate a user, clear the User Active checkbox or from the main user screen click the deactivate button. Once deactivated, the user will no longer be able to access AssetWhere.
- Click the Save button to apply the changes. The user's details will be updated immediately.
Note: To preserve the audit history and record of changes made in AssetWhere, users are not permanently deleted. Instead, they are deactivated. This ensures that all historical actions and updates remain associated with the original user account while preventing the user from accessing AssetWhere. If you would like all deactivated users to be removed from the user list, please reach out to us at assetwheresupport@tes.com
Was this article helpful?
That’s Great!
Thank you for your feedback
Sorry! We couldn't be helpful
Thank you for your feedback
Feedback sent
We appreciate your effort and will try to fix the article