TABLE OF CONTENTS
Overview
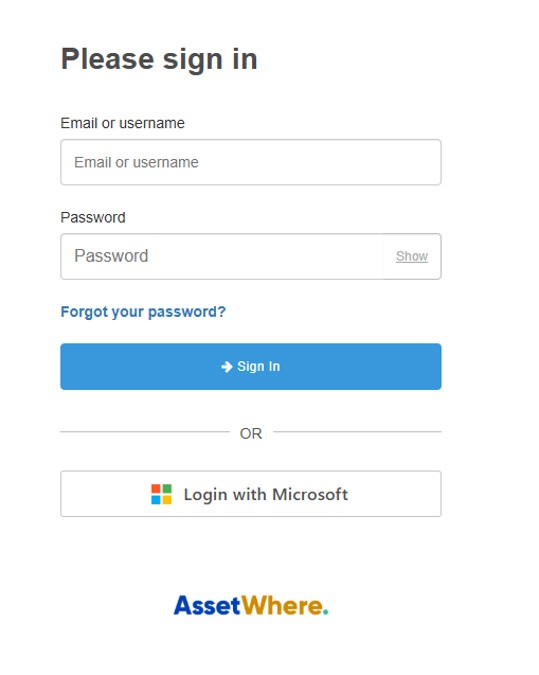
We have introduced a mechanism to log in with Single Sign-On (SSO). As of now, we are supporting Microsoft SSO using OAuth.
Expectations:
Each tenant has their own Microsoft account and active directory, and they maintain their own users.
Separate Azure App to support AssetWhere.
Clients will configure the app and provide required info for SSO to the Tes AssetWhere team.
Creating the App
Visit Microsoft Azure https://portal.azure.com/
Click Menu > Entra ID
Click on Menue > App Registration
Click on + New Registration and add the below details
Name: AssetWhere (recommended)
Support Account Types: Select Accounts in this organisational directory only (Default Directory only Single Tenant)
Redirect URI: Can be left empty for now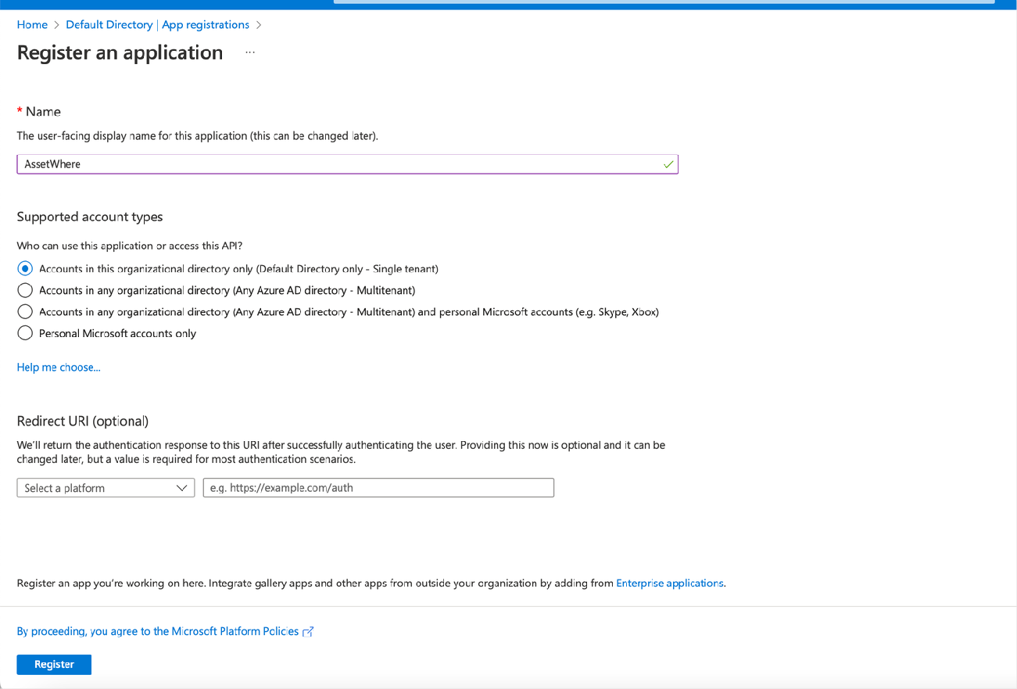
Click Register
App Configuration
Click Menu App Registration
Select the app created for AssetWhere
Configuring Redirect URI
Microsoft SSO requires a redirect URI. As a user, once you have logged in with SSO, then you will be redirected to this URI which will complete the login process.
Click on Authentication
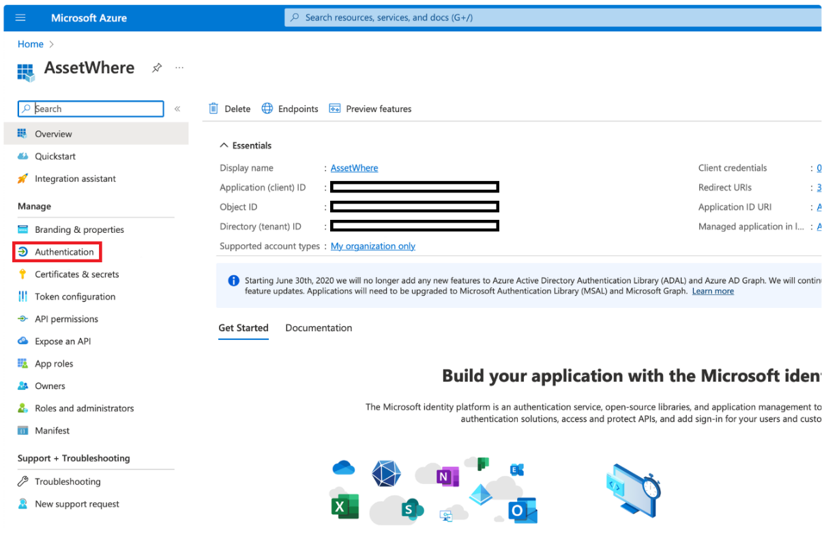
Under Platform Configurations
Click on Authentication
Choose Web
Enter
Redirect URI: https://education-horizons-p1.fusionauth.io/oauth2/callback
Implicit grant and hybrid flows:
Select both:
Access Token
ID Tokens
Click Save
Configure Permissions
Go to API Permissions
For AssetWhere to read critical information for successful login, we need to set four API permissions. The four required are:email
openid
profie
User.Read
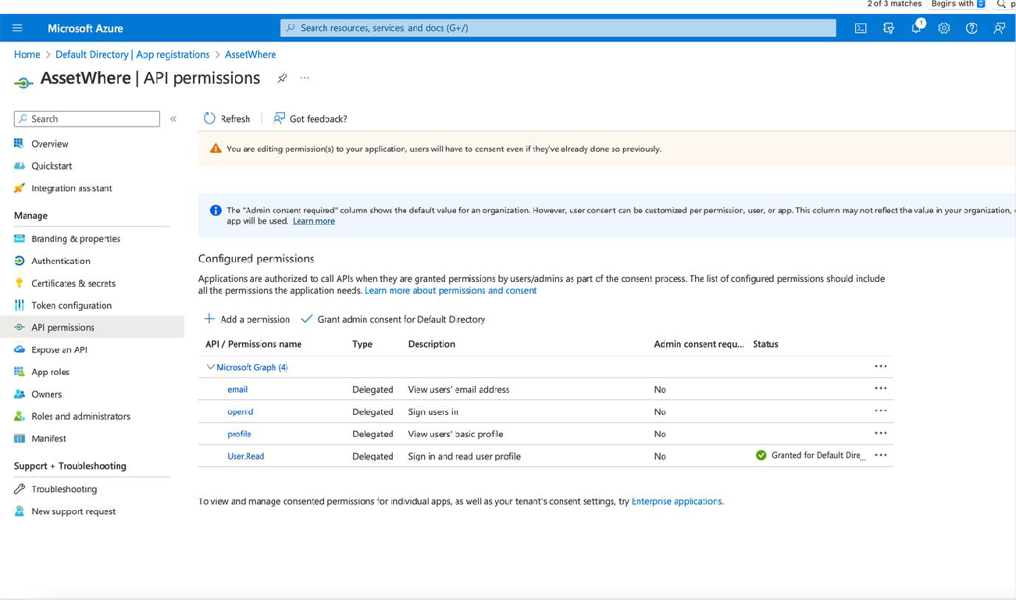
After adding these permissions click grant admin consent for <Organisation Name> for each API
Where organisation name is your school's name or your organisations tenant name.
A Microsoft Entra Administrator may be required to approve the requested permissions
Confirm the permissions show a status of Granted for <organisation name>
Configure Credentials
Skip steps 1-4 if you are already in the AssetWhere App
Visit Microsoft Azure https://portal.azure.com/
Click Menu > Entra ID
Click Menu App Registration
Select the app created for AssetWhere
Click on Certificates & Secrets
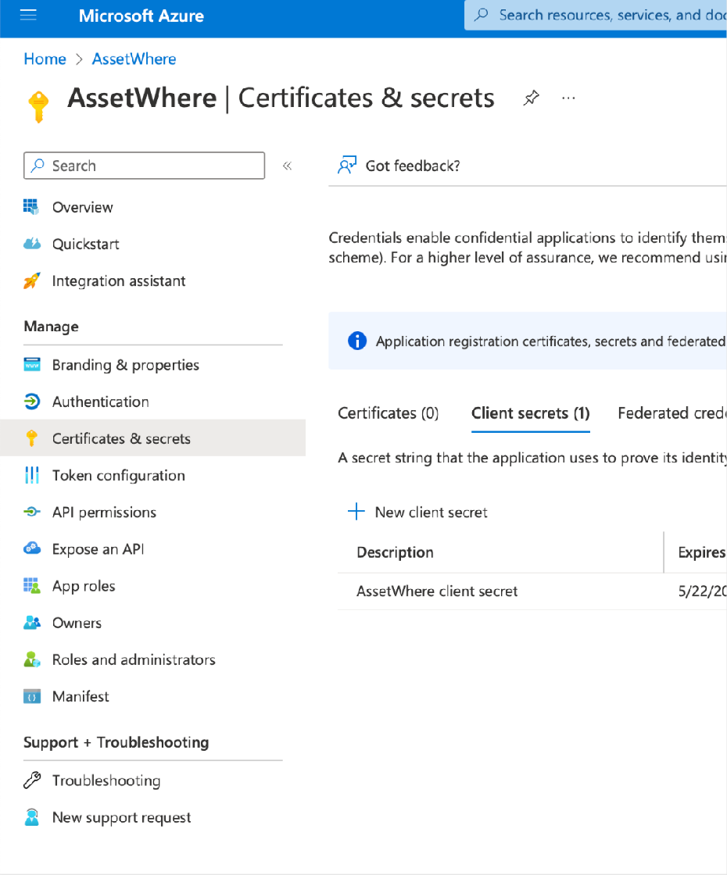
Click on New Client Secret
Add description: AssetWhere Client Secret (or any description that suits your organisation)
Expire: It is recommended to select a 6-month duration. If not renewed promptly, access to AssetWhere via SSO will fail, potentially leading to an increase in support calls. Consider scheduling the expiry to best suit your organization's needs and security.
Click Add
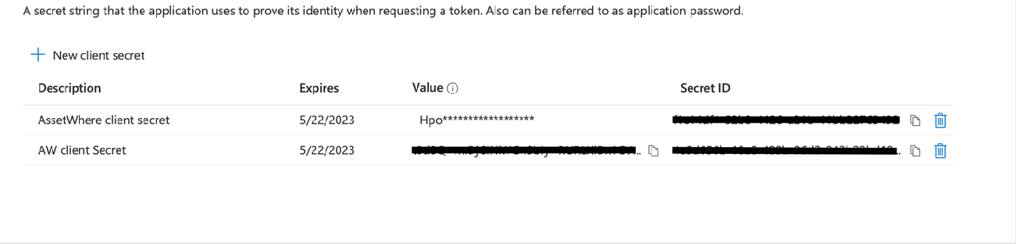
You will see the Value & Secret ID, copy the Value & Secret ID, and keep it somewhere secure. You will need this Value to send to the Tes AssetWhere team for them to complete the SSO set up.
Sending Details
Click on Menu > Overview
Please send the following values to your Tes representative or to assetwheresupport@tes.com
Directory (tenant) ID
Application (tenant) ID
Under Certificates and Secrets
Value (also known as secret value) generated in Step 10 of Configure Credentials
Once the values have been received by the Tes AssetWhere team, we will complete the set up and confirm successful log in with yourself or staff member with AssetWhere access.
Was this article helpful?
That’s Great!
Thank you for your feedback
Sorry! We couldn't be helpful
Thank you for your feedback
Feedback sent
We appreciate your effort and will try to fix the article