Overview
The Print tool allows you to create map outputs directly from AssetWhere. You can customize the map extent, layout, scale, legend, logo, and export format before downloading your map.
Instructions to How to Print Your Map
Step 1: Select your area
- Navigate to the area you would like to include in your exported map, or;
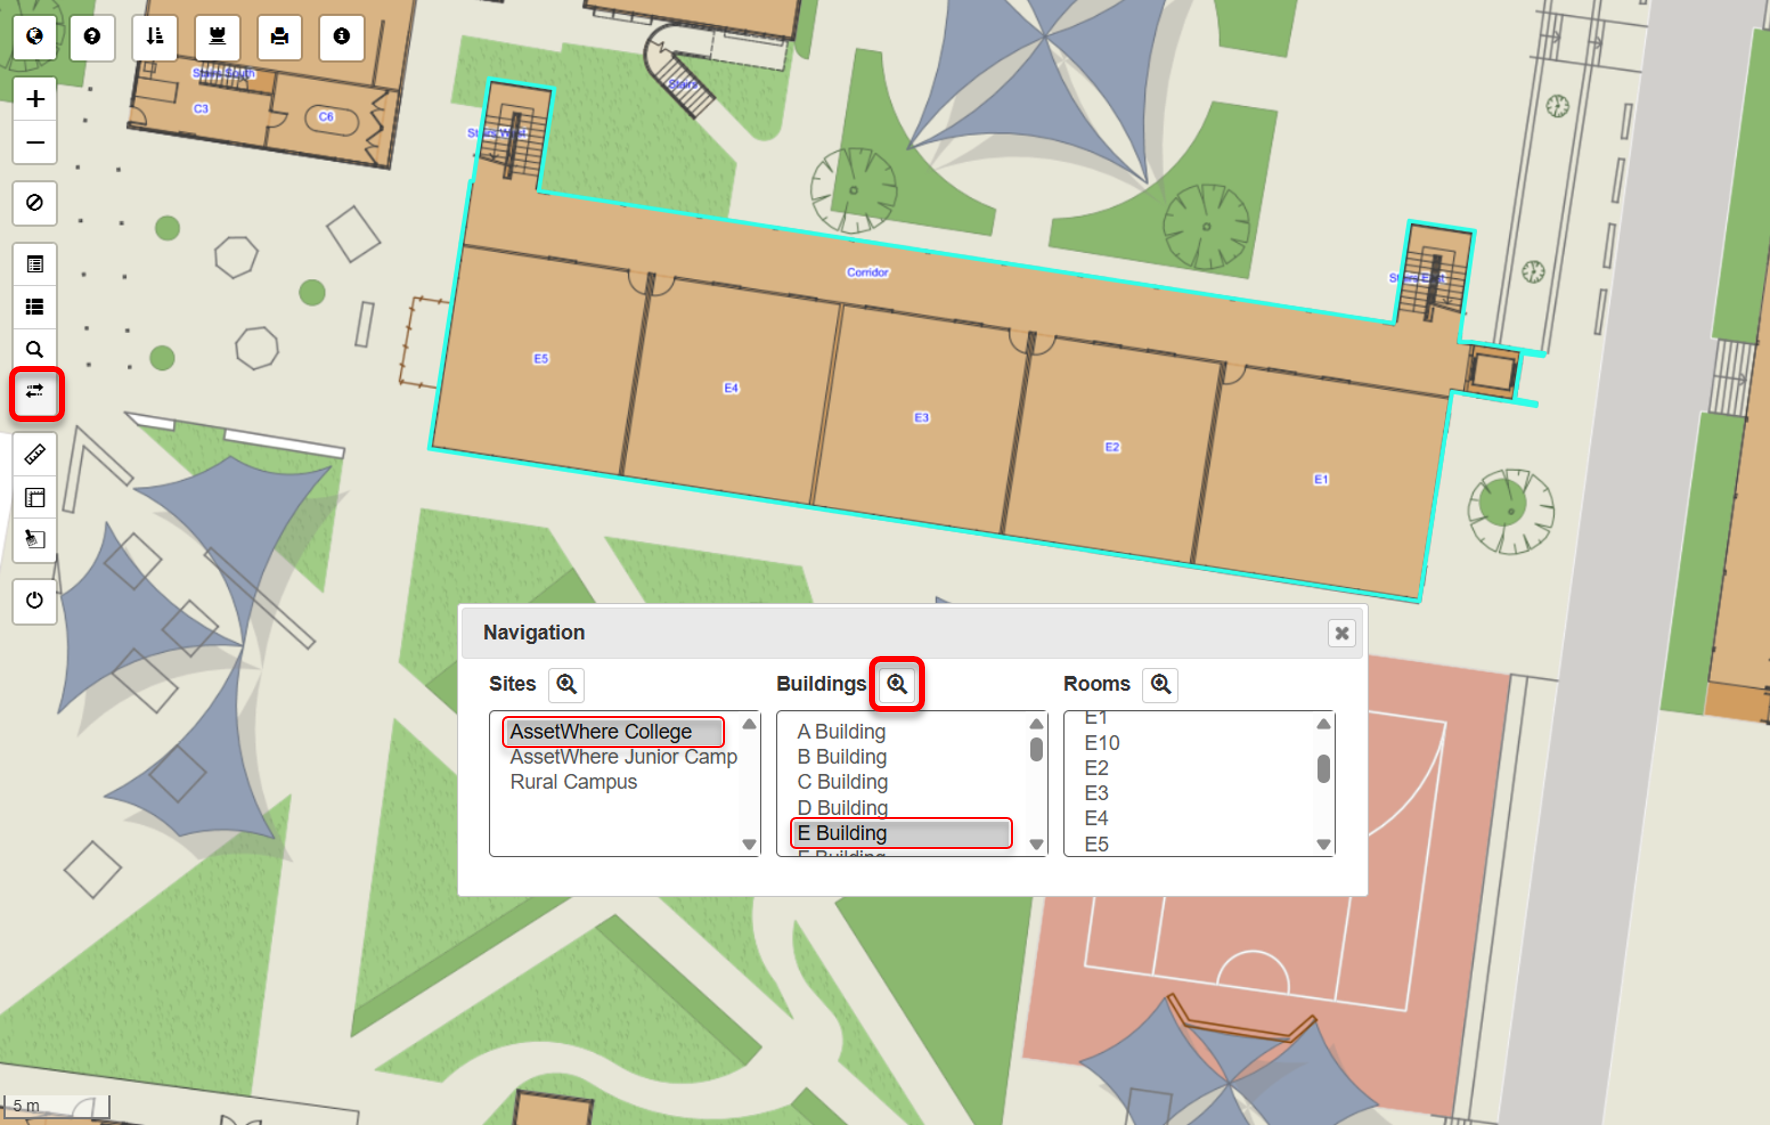
- For quick access, using the Navigation tool, select the site, building, or room you want to print. You can use the magnifying glass to zoom into your area of interest. This will centre the selected area on the screen for the best print result.
Step 2: Turn on/off applicable layers
- Before entering the print function, use the Layer Manager to turn on/off any applicable layers.
Tip: We highly recommend turning off the Open Street Map layer under images.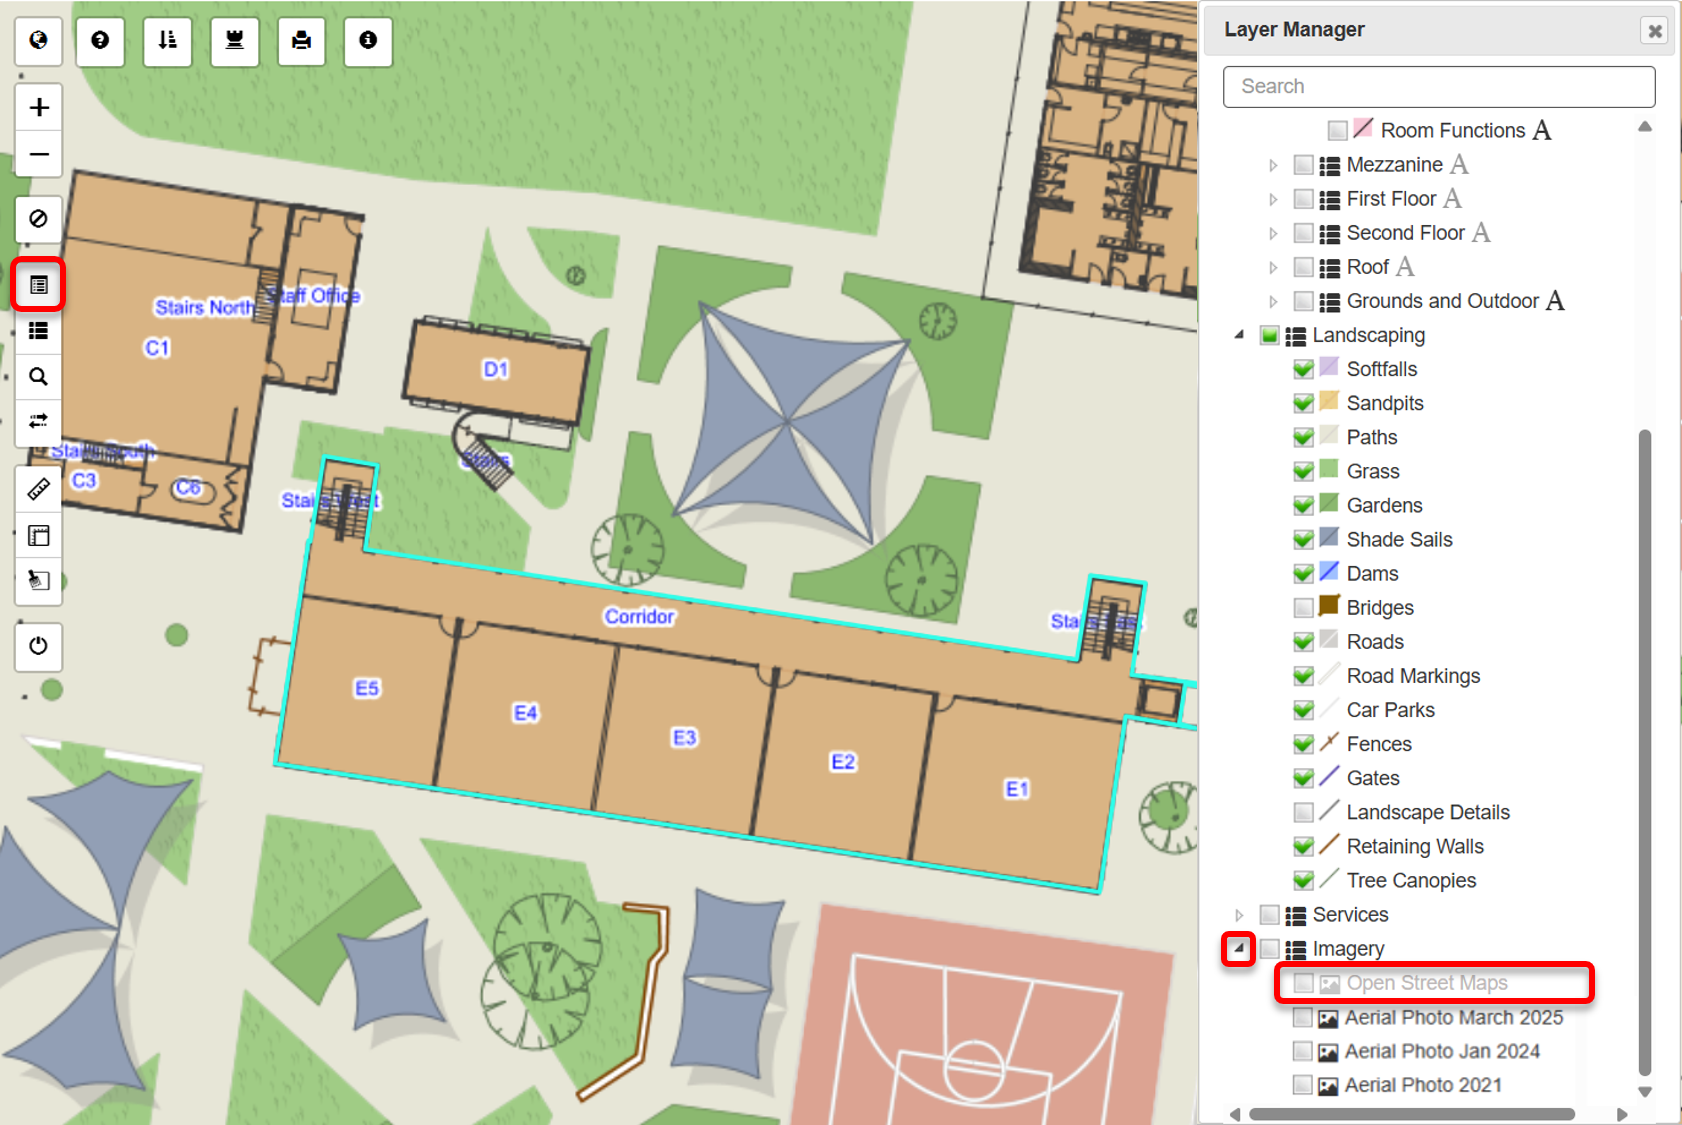
Step 3: Open Print Settings
- Close the Layer Manager and click the Print button in the top menu.

- The selected area should now appear centred within the red bounding box, ready for printing.
Note: The red box indicates the map extent that will be included in the printout.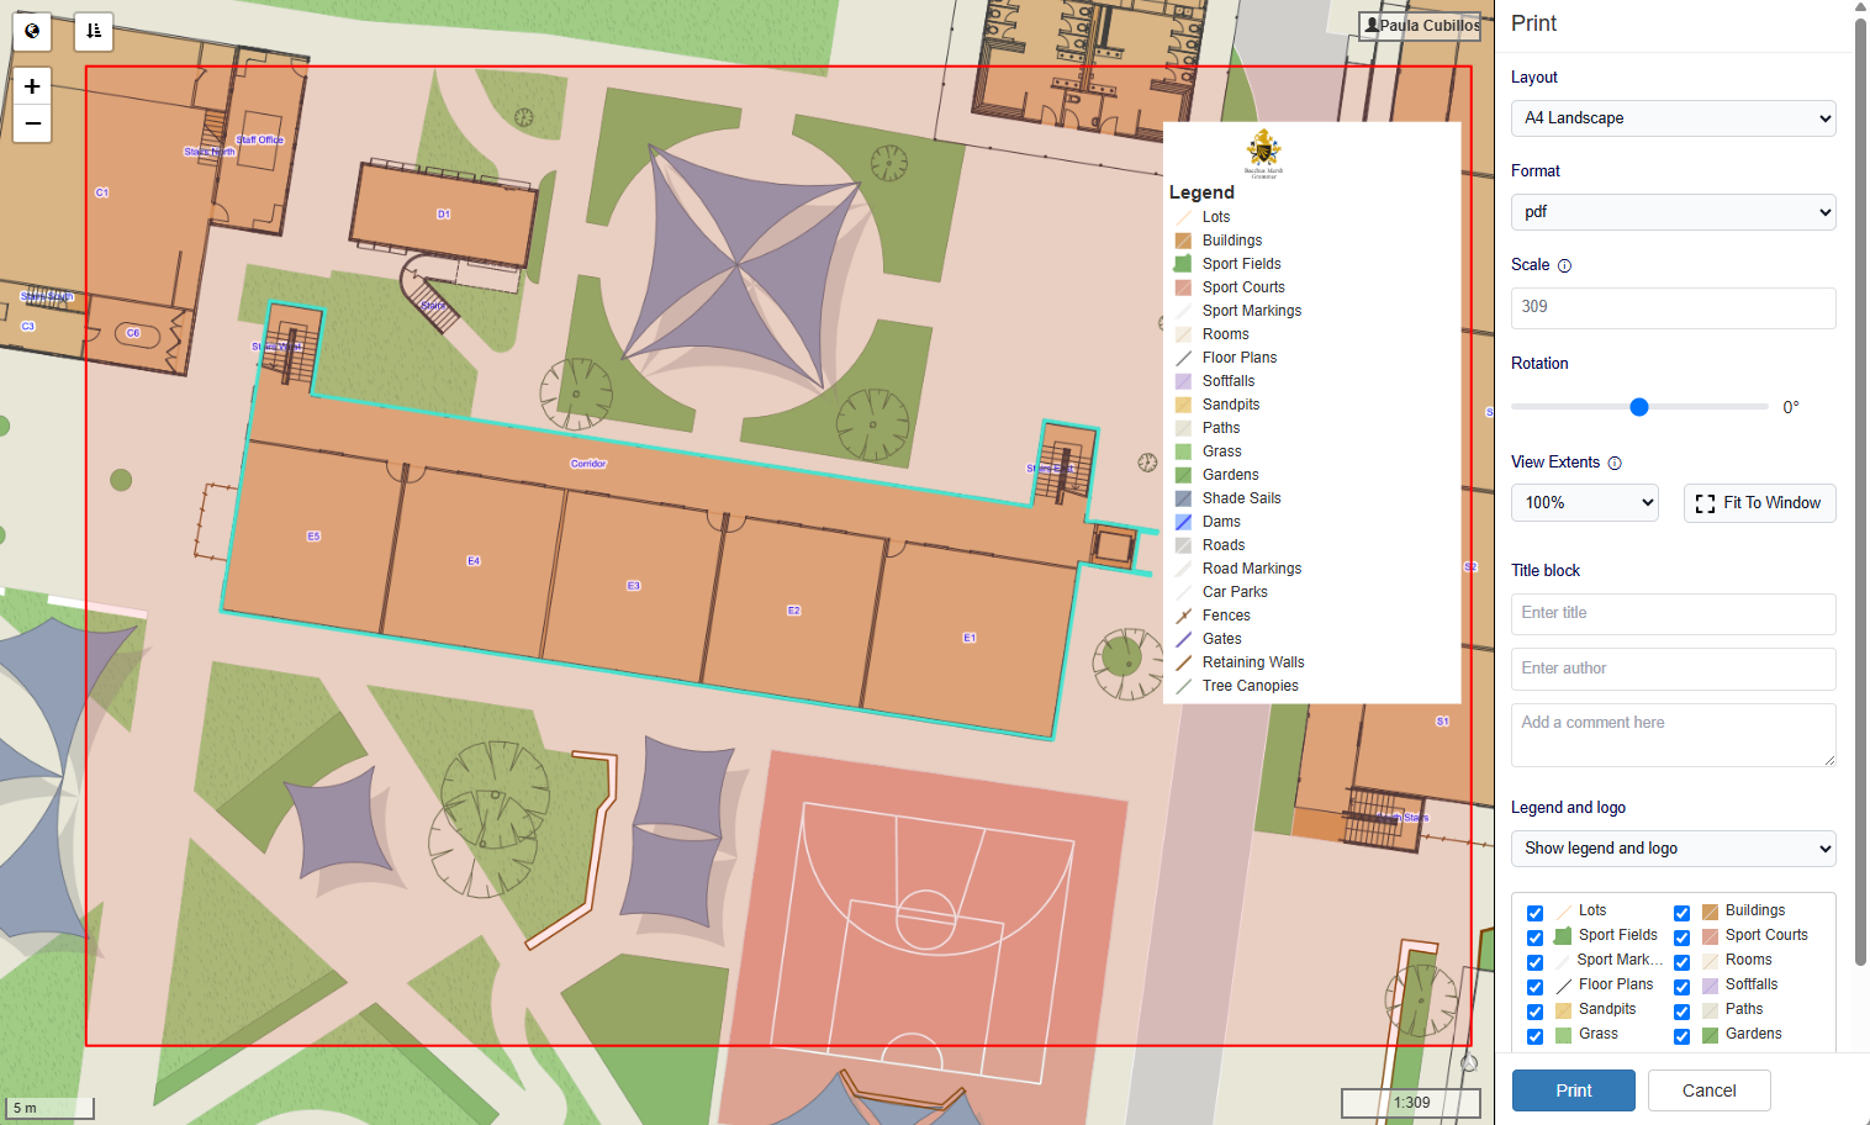
Step 4: Adjust the Scale
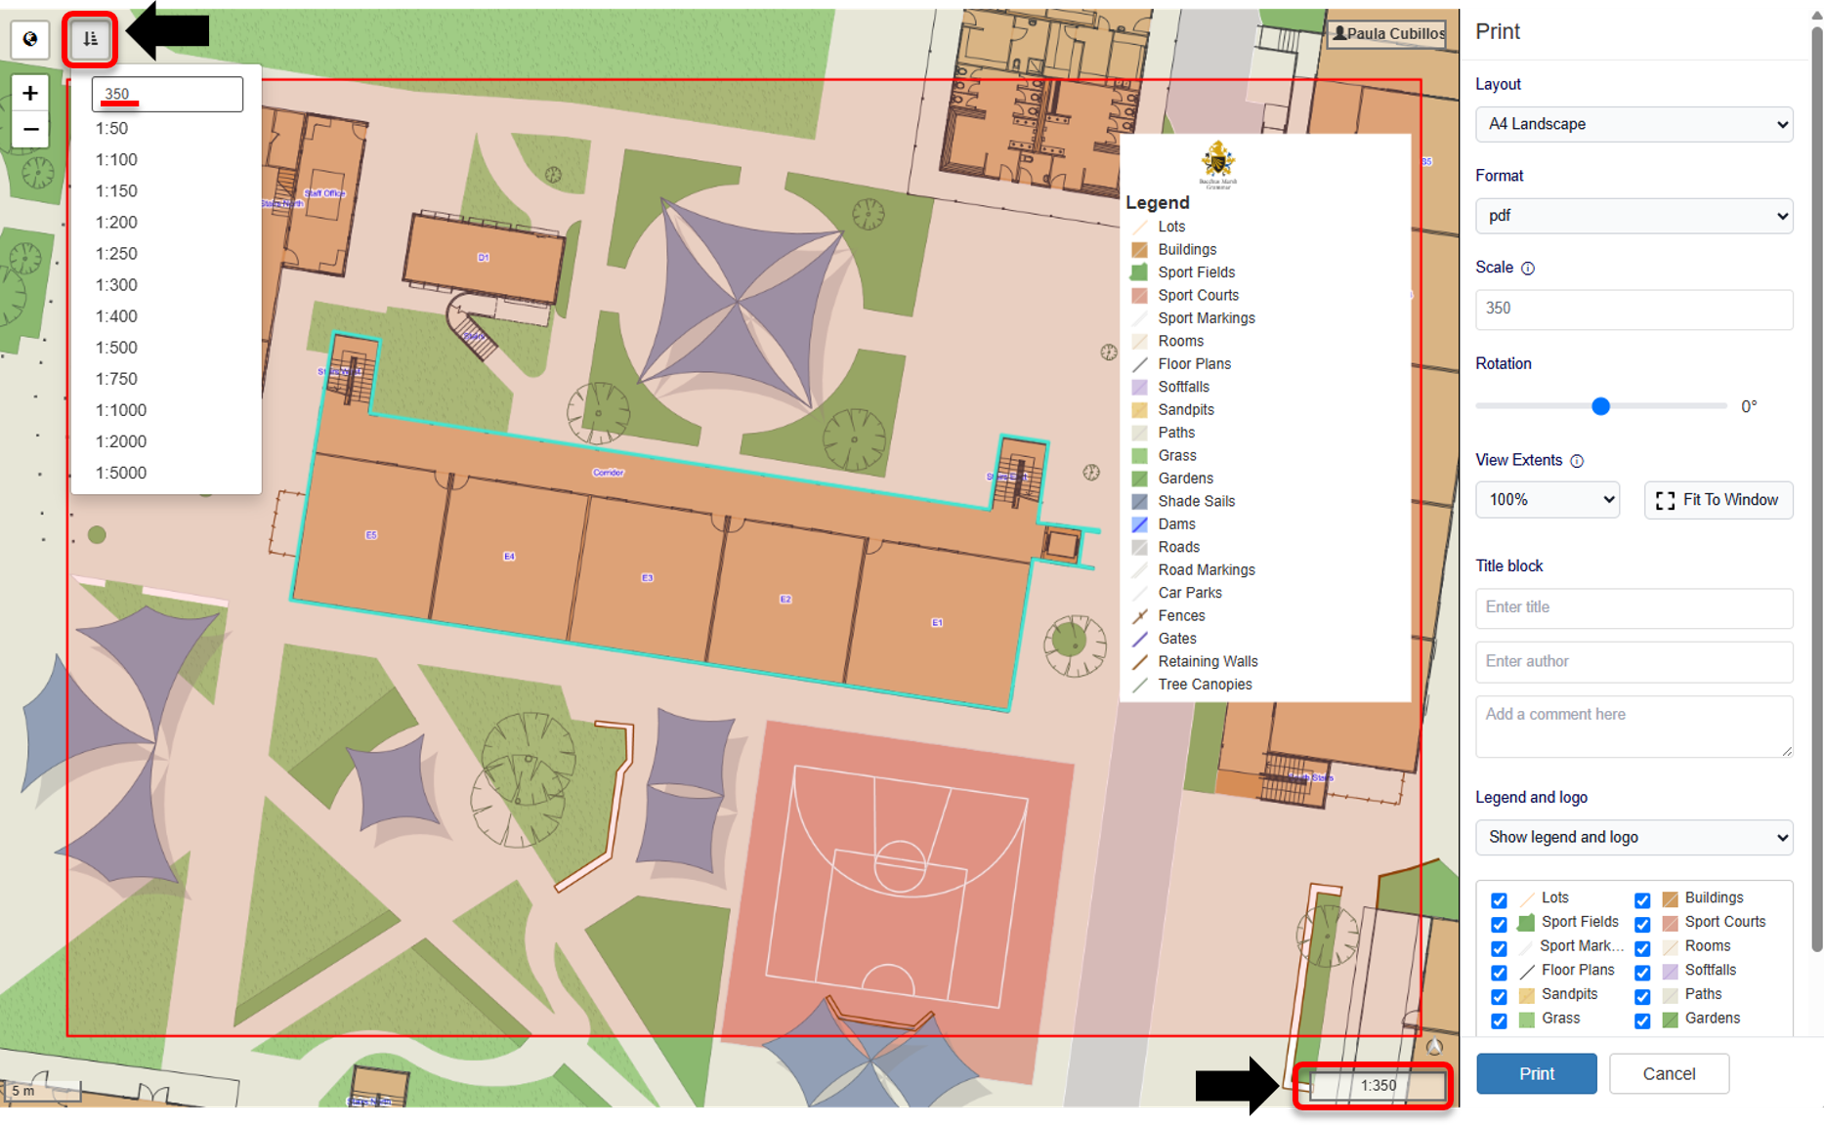
- To zoom in or out, use the Scale tool
The current scale is displayed in the bottom right corner.
To zoom out, increase the scale value (e.g., by 25 or 50).
To zoom in, decrease the scale value or select from the preset scale options.
Tip: Adjusting the scale can help create a buffer around your building or area.
Step 5: Rotate the View (Optional)
- If needed, use the Rotation slider to align the layout.
You can drag the slider or double-click the value to enter a specific angle.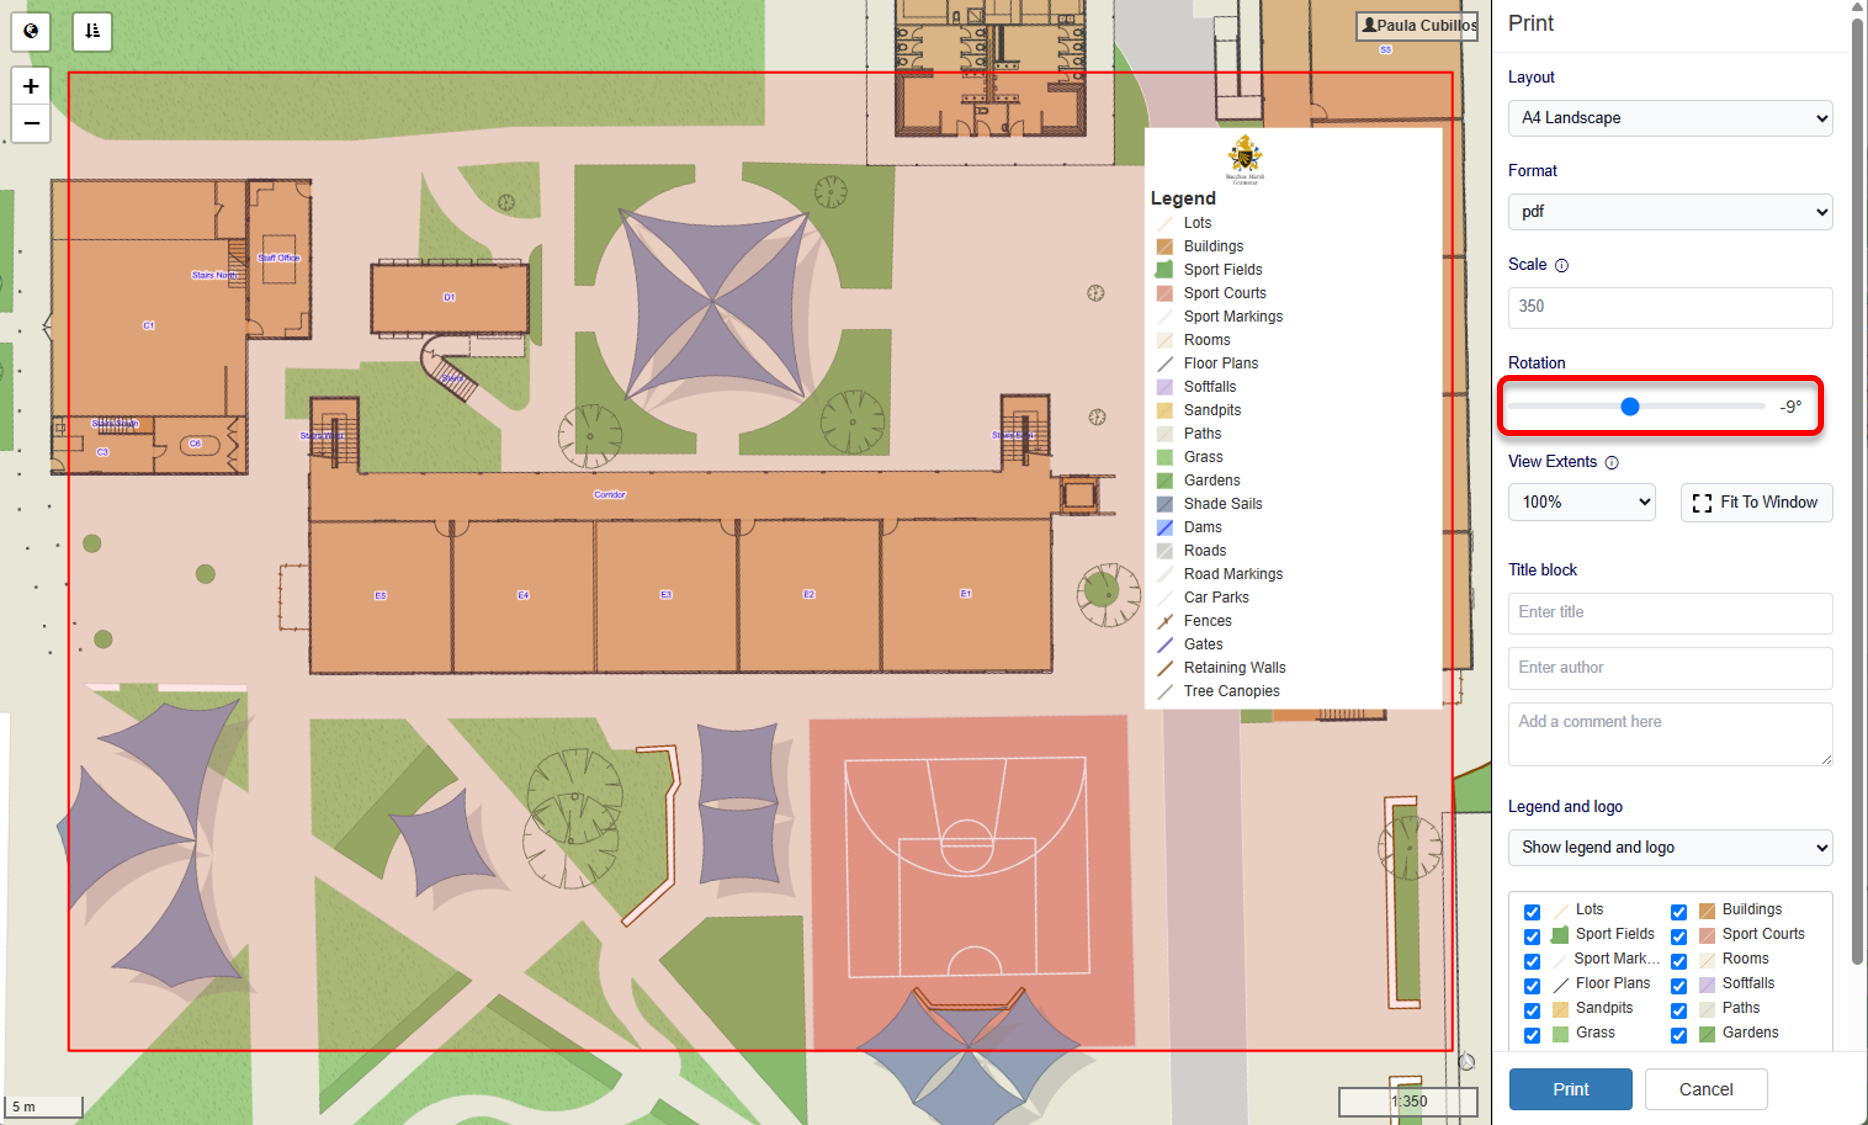
Step 6: Configure Print Settings
- Review and adjust the following settings:
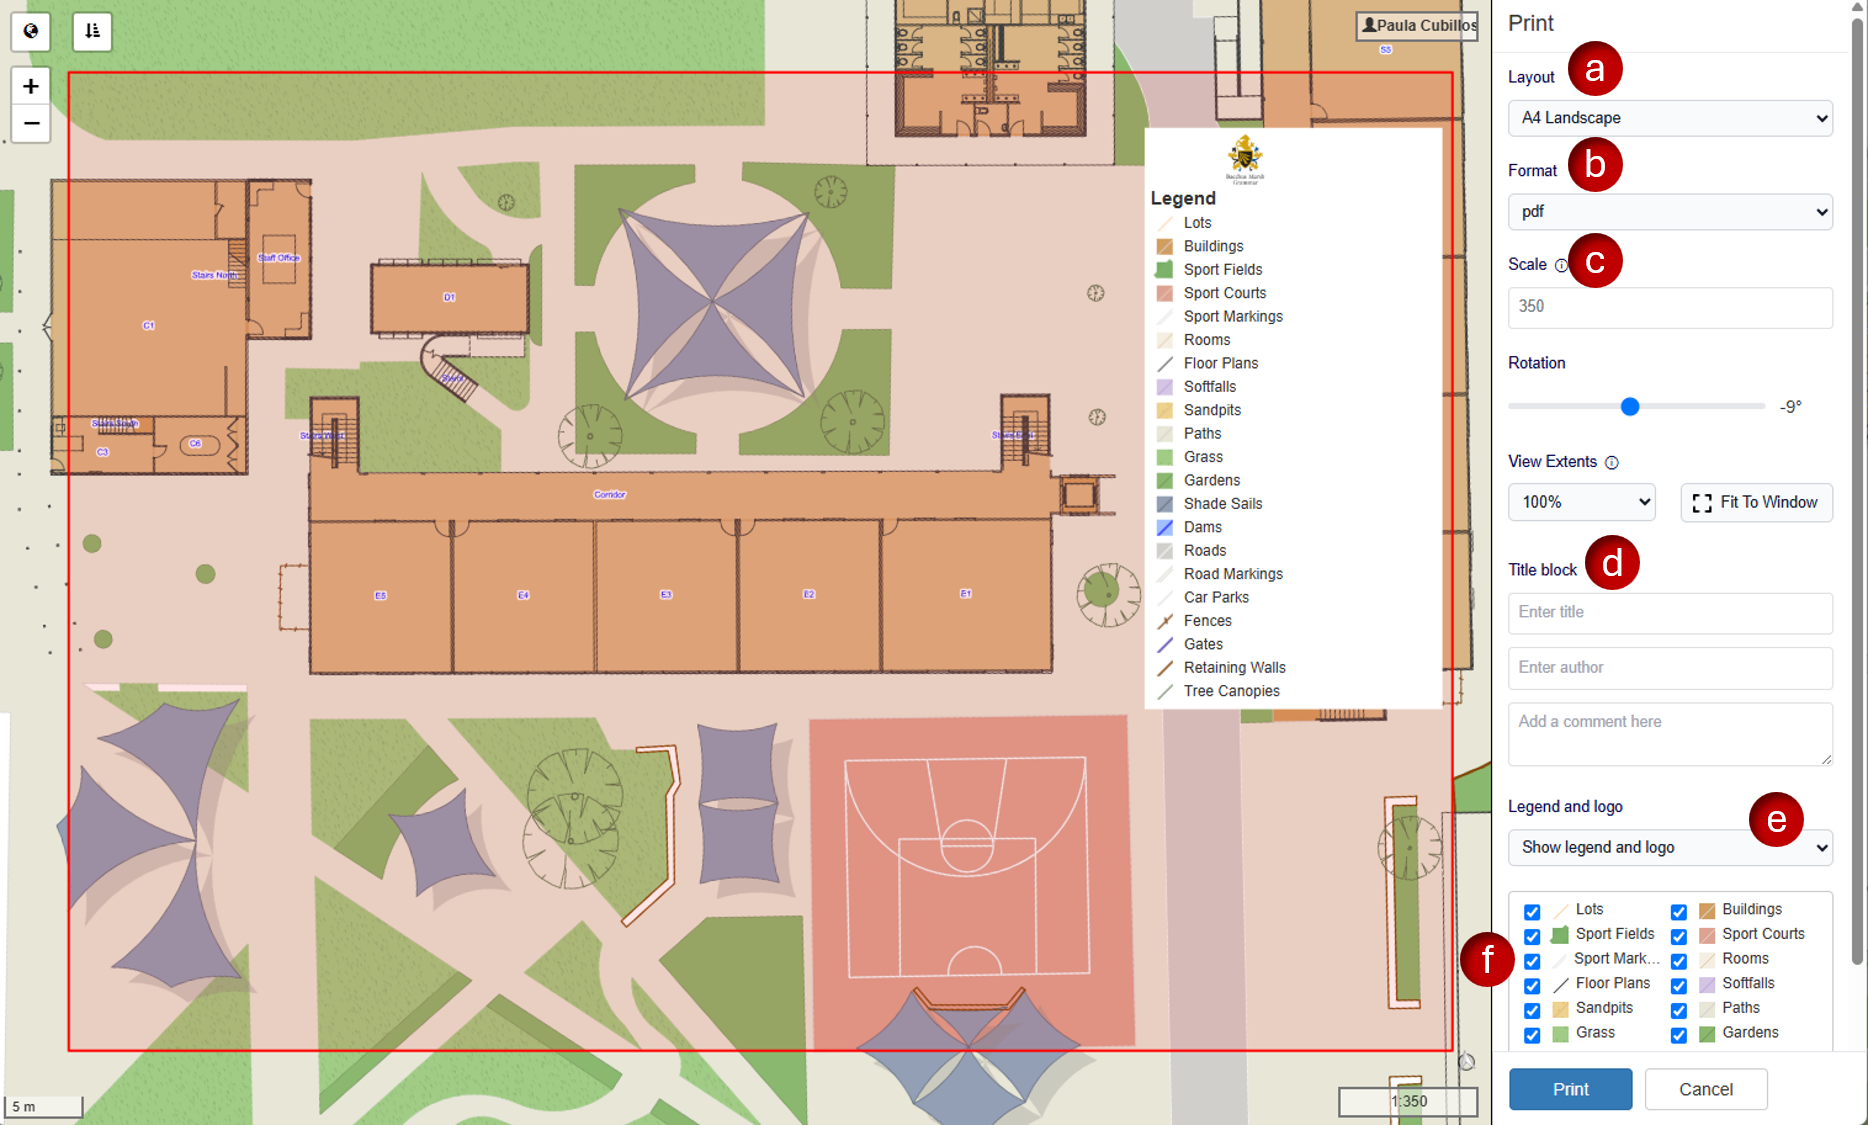
- Layout: Choose the required paper size and orientation. The available options are:
- A4 Landscape
- A4 Portrait
- A3 Landscape
- A3 Portrait
- A2 Landscape
- A2 Portrait
- Format:Select your preferred output. The available options are:
- JPG
- GIF
- PNG
- Scale & Rotation: Confirm your previous adjustments (Step 4 & 5).
- Title block: Enter additional information that will appear on the printout:
- Title: Enter a map title (e.g. Science Block
- Author: Add your name if required
- Comments: Add any relevant comments
- Legend & Logo: Choose whether to display the legend, the school logo, both, or neither:
- Select whether to include the legend and/or logo Note: The legend reflects the layers currently active in AssetWhere not just within the print view.
- You may remove by unchecking unnecessary layers or hide the legend entirely
- Legend Items: If the legend is displayed, select the checkboxes for the map elements you want listed in the legend
Step 7: Print
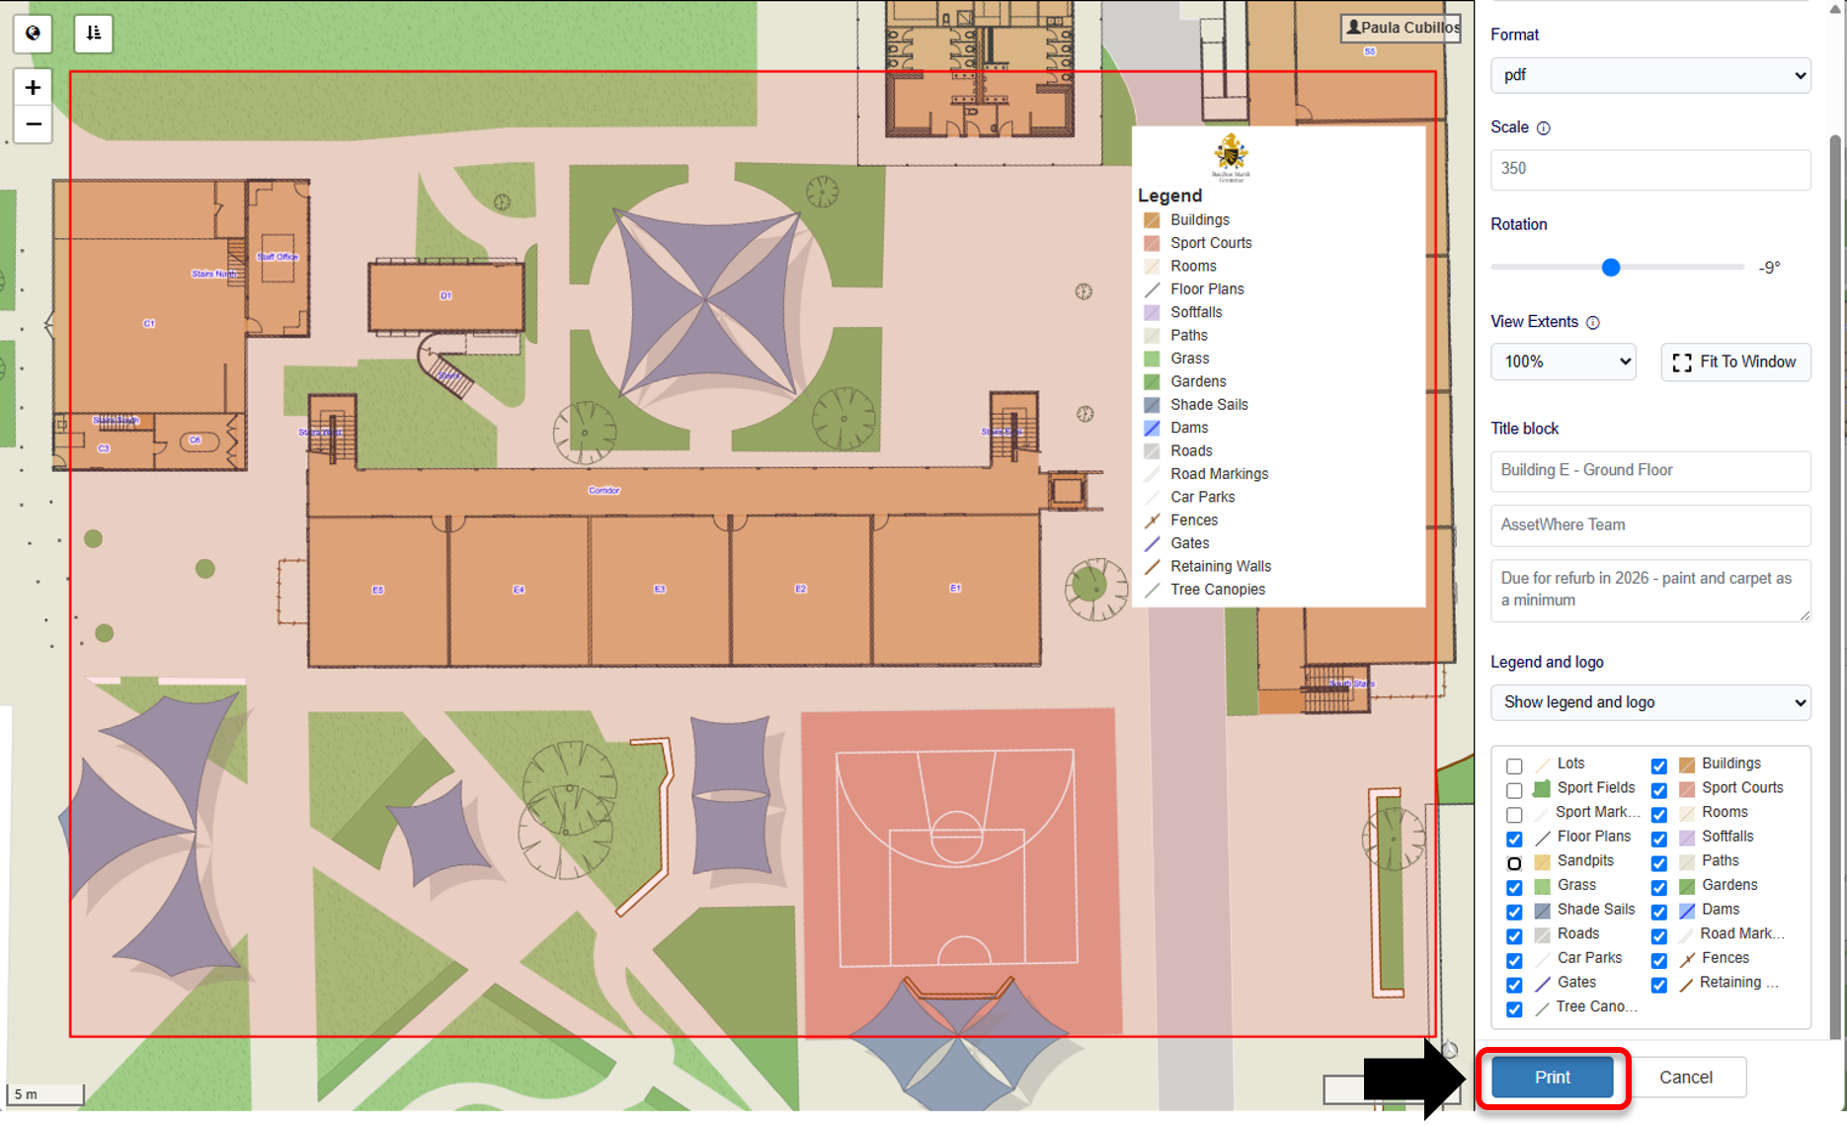
- Once you are satisfied with the layout and settings, click Print.
Your file will download automatically via your browser or be saved to your default downloads location (depending on your computer settings).
Need Help?
If you are still unable to see the updated assets after completing the steps above, please email us at assetwheresupport@tes.com . Our team will be happy to assist you.
Was this article helpful?
That’s Great!
Thank you for your feedback
Sorry! We couldn't be helpful
Thank you for your feedback
Feedback sent
We appreciate your effort and will try to fix the article